
2024 W O R K S H O P S
FINE ART: DRAWING AND PAINTING
CRAFTS: MARDI GRAS MASKS, WALL PLACARDS AND HOLIDAY ORNAMENTS
ART PARTIES! BIRTHDAYS, CHILDREN'S EVENTS AND
SIP & PAINT
F I N E A R T C L A S S E S
We approach teaching as an interactive demonstration of materials and techniques, so that each person can watch and learn while working on their own creation at their own pace. It's more workshop than classroom, with individual attention and no judgment.
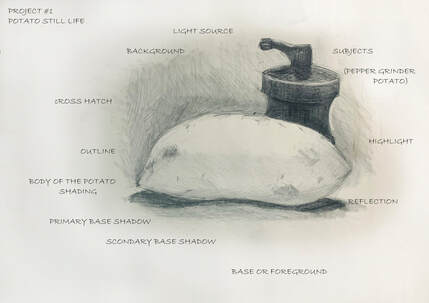
The projects we explore are: DRAWING: Basic forms and the study of light and shadow. Mediums include graphite pencil and charcoal pencils. Still Life using household objects. Portraiture by studying the master artist, John Singer Sargent. Landscape rendering from photographs. PAINTING: Watercolor, and pastels.* Mediums include pan watercolor, tube watercolor, gouache, watercolor pencils, pastels in sticks and pencils. Subjects very depending on the level of participants.
FOR MORE ON FINE ART SEE WWW.LESLIEHAMILTONART.COM or CONTACT ME HERE or AT THE STUDIO: 818-999-5628
|
|
C R A F T C L A S S E S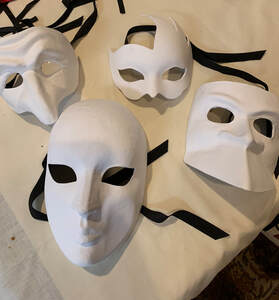
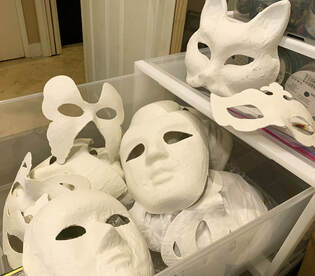
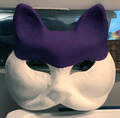
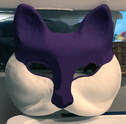
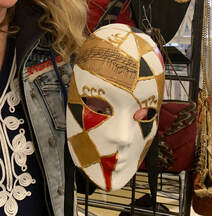
Mask blanks from our favorite shop in Venice, Italy.
Click below to see their gorgeous works! https://www.camacana.com/en-UK/rediscovering-traditional-venetian-masks.phpOUR NEXT CLASS WILL BE:
|
|
|
|
|
|
|
CALL LESLIE TO SCHEDULE A WORKSHOP OR PARTY
STUDIO: 818-999-5628
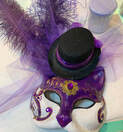
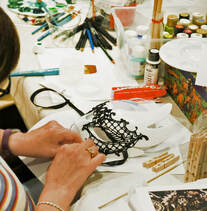
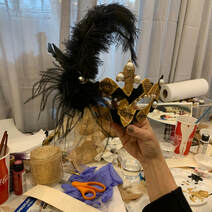
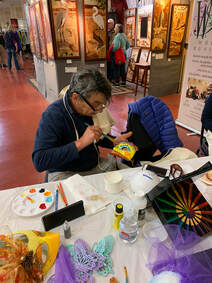
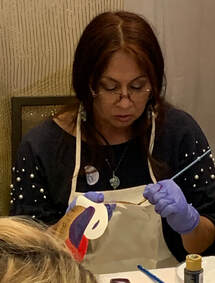
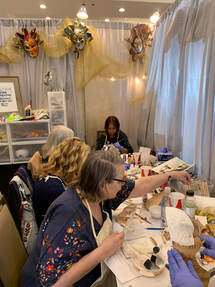
-MY STUDENTS AT WORK-
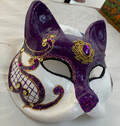
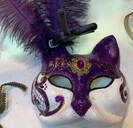
DECORATING MASKS
Masks are one of the oldest forms of art. Perhaps the
original "Wearable Art." A mask could inspire the wearer
and the audience, enhance drama and music experiences,
or simply to hide the identity of the wearers.
original "Wearable Art." A mask could inspire the wearer
and the audience, enhance drama and music experiences,
or simply to hide the identity of the wearers.
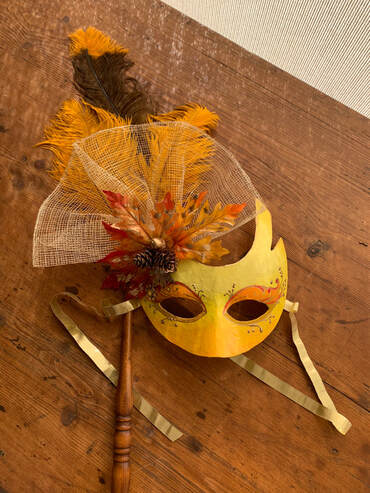
O U R P R O C E S S
We take inspiration from the mask makers of Venice, Rio and New Orleans, We even get inspiration from Puppetry around the world! We start by using papier-mache' or decoupage to strengthen and water-proof the base material. The craftsmenship of these pieces inspires us and serve as visual cues for our own themes, design, colors and techniques!
Prep: Using a primer, such as Gesso, we paint the entire mask inside and out. After it is thoroughly dry we sand (150/200 grit s/p.) any lumps and edges down and re-prime. You now have a "blank."
Plan: While the blank dries,* draw a template using paper, a soft pencil (4B) and colored pencils to block in the design, layout and colors of your mask. This is an extra step that will save you time and trouble later. Make changes on the paper, not the mask! If the design includes a section blocked out for decoupage, apply the applique now before you paint and trace it in place.
Paint: There are 2 ways to transfer the image you've created on paper. One: Copy it with the 4B pencil, using a light touch. Draw the largest sections and paint in those indicated in pencil. Start painting in the base (background) colors. Give each layer time to dry.* Two: Trace on to the blank with graphite paper and paint in, starting with the base colors, as above. Doubt your drawing ability? STENCIL for a specific pattern that you want. Use a ready-made or make your own.
Protect: Make sure the paint and glue Varnish the final painting. Let dry!*
Detail & Trim: Apply your feathers, ribbons, fabrics, trim, "gems" and what-not! (Adding any decorations, such as crystals, gems, beads, bric-a-brac, feathers, trim, ribbons, etc., will require adhesion,) A hot glue gun, craft glue and epoxy will all work to complete the accessorizing of your mask. (If the glue oozes, wipe it immediately with a damp cloth).
You have a beautiful, hand-made creation for display, a gift or table decoration for parties any time of year!
*Use a hair blower (med. heat) to speed up the drying time.
|
|
|
|
|
|
SEASONAL ARTS
S A I N T S & S C O U N D R E L S
|
Starting with an idea, it's easy to make a holiday placard for the front door to welcome friends and family. All it takes is paint, decorative trims and any of the other materials that we supply you, or you bring from home,
Honor a newborn with their patron saint to hang in their nursery. Commemorate someone's special life. Hang your creation up to be your lucky charm. Our saints and scoundrels are all pre-cut and primed for you to use as the base "blank." We provide templates to trace on to the wood forms, so it is like a paint-by-number project. Simple and simply beautiful because YOU make it. You can even make one to commemorate a special pet! |
All our plaques are solid wood, 1" thick, 24" long and 11" tall.
|
What's more fun than a "Mommy and Me" experience? Mommy, you and your friends!
Whether it's a birthday, bridesmaids' luncheon or bat mitzvah, we do it!
Whether it's a birthday, bridesmaids' luncheon or bat mitzvah, we do it!